

I’ve been going to my gym for about six months now, and since I joined I’ve always wanted to try a spin class. In fact, my gym (Edge Fitness) has spin classes as part of the top level of membership, and that’s why I signed up for that level. So far I’ve tried two Les Mills classes: Body Pump and RPM.
What is Les Mills’ Body Pump?
Body Pump is a fast paced workout where you lift light barbells for high reps to up tempo music. It’s a full body strength training and cardio workout intended to help you build lean muscle.
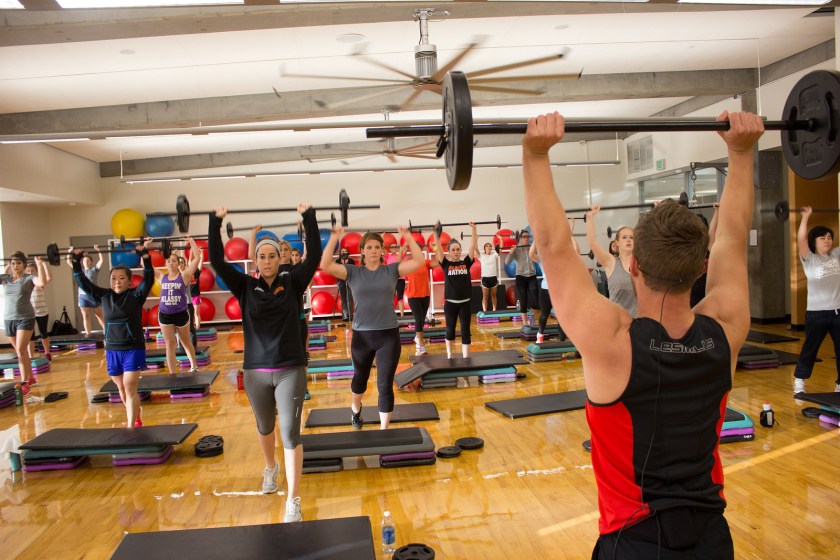
AML & Body Pump
I freaking LOVE Body Pump. This is the perfect workout for me: steady reps of weightlifting with quick transitions and low down time. This workout gets your heart rate up without making you feel like you’re going to die, and the music helps keep you in the rhythm of it all. My instructor was upbeat and friendly, and the mood was positive the whole time. My first time I was sore for several days, and I LOVED it.
What is Les Mills’ RPM?
RPM is a spin class, meaning you and several other people are all in a spin room on stationary bikes. RPM features hill climbs, sprints and flat riding without any special moves. You just use the speed of your pedaling and the resistance knob on your bike to make the workout harder or easier. This is all done alongside loud, upbeat dance music to help you keep pace, similarly to Body Pump.

AML & RPM
I have been intimidated by spin classes for a long time, but I’ve always wanted to try one. I introduced myself to the instructor before the class and told her that I had never taken a spin class. She warmly showed me how to set up my bike and explained how the class would work. I chose a bike in the front row but slightly off to the side so I could see the instructor well, and so I wouldn’t be able to see other people and compare myself to them. What helped was that the room was darkened and flooded with a cool blue light, giving the room a dance club-like feeling.
The moves were all relatively easy to pick up, and it’s very easy on the joints if you set your bike up correctly. The hardest part of the workout was when we did hill climbs: cranking the resistance up on the bike so you need to stand and use your body weight to pedal. There were definitely times where I had to lower the resistance and return to sitting, as my heart rate got into my red zone. But once I was back in a safe range I went back to following the workout, making adjustments as necessary.
By the end of the 45 minute workout EVERYONE was literally DRIPPING with sweat. It took me a moment to allow my legs to slow down so I could carefully stand, but as I exited the spinning room I was struck by such a sense of elation from the adrenaline I felt on top of the world.
There is a tiny downside to spinning: I was sore… on my “seat”. As in, where the seat hit my… uh… you know. Where you sit on the bike. Ladies, you know what I mean. This lasted 3 days! Not awful, I just had to be careful how hard I sat down on my couch at night! I didn’t experience any leg soreness, but I did burn more than 500 calories in a 45 minute session, and I count that as success. In the end, it was a blast, and I’d definitely try it again!
Ready to Try a Class?
Arrive early and introduce yourself to the instructor. I made sure I let both instructors know that I was new to both their class and to that style of workout. It’s in their best interest to help you both enjoy yourself and get the best workout, so they’ll want to help you. And don’t worry about the other people in the class, they’re all all just focused on their workouts, and you should too. So go, try it out, and have fun!


 I feel like I can finally announce it here since it is now officially official. In 2018 I will be co-hosting a podcast called

 You’ve heard of a regular deadlift, but you may not have heard of a Romanian deadlift. A standard deadlift starts with the barbell on the floor and you lift the barbell up, while a Romanian deadlift starts with the barbell in your hands as you are in a standing position and you lower the barbell down. I’m personally more comfortable with lowering and lifting back up then trying to lift from the floor. I feel like it puts less strain on my back, which is important: when lifting weights of any kind, or doing kettlebells, your back is the most vulnerable place and should be carefully protected by using the best form you possibly can. So how do you get the best form?