
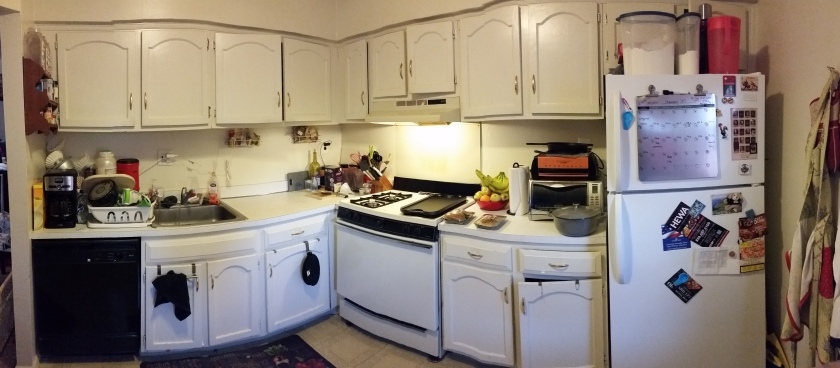
For those of you that don’t know, The Hubs and I live in an apartment. We’ve been here for 8 years, and while we have a decent sized eat-in kitchen (10 1/2 x 10 1/2 feet), the counter space is minimal at best. I’ve spent 8 years working on a 30″ square piece of countertop to make the delicious recipes I show you here. Well, after 8 years of finagling my ingredients into piles of semi-functional chaos, I’d had enough.
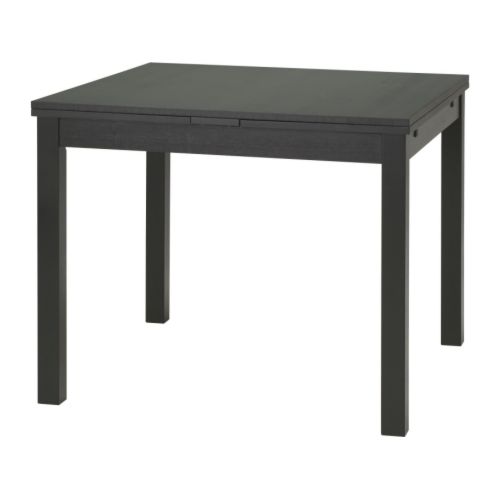 We’ve had this really cool Ikea Bjursta Extendable Table since we moved in. It has 2 leaves that pull out to make the table larger. The problem is, we never used it for anything. Okay, that’s not true, we stored our garbage and recycling bins under it and I had my light box on top of it for a while. But recently I moved my lightbox out of the kitchen and into the dining area, and The Hubs had a brilliant idea.
MAKE IT A ROLLING CART.
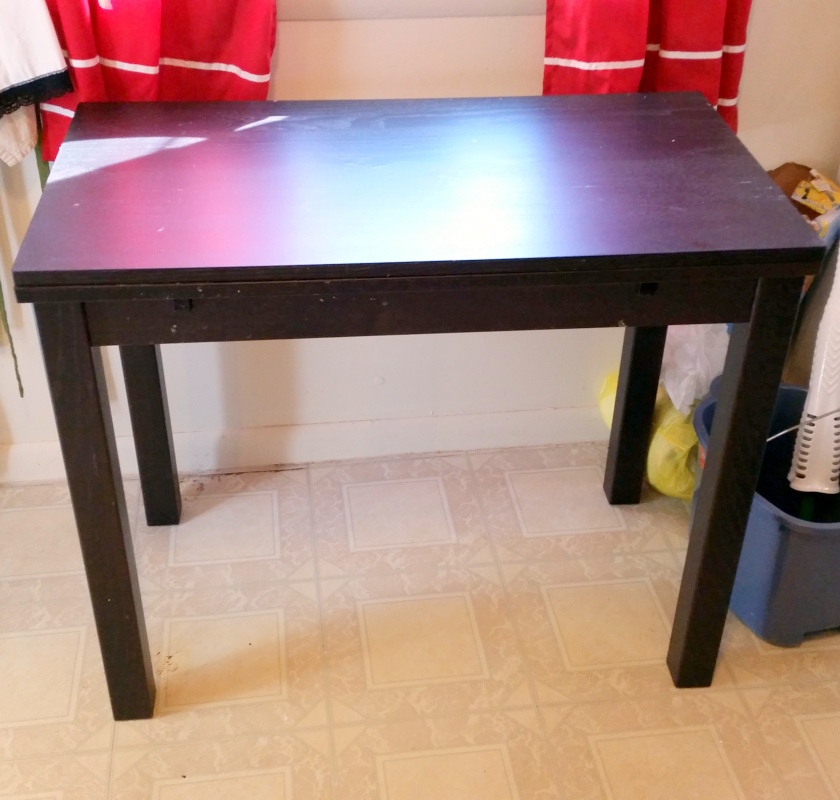
Now, The Hubs is the ideas guy, and I’m the make it work girl, so between the two of us we’re pretty proud of the results. A rolling cart of this size, bought fully assembled, as sturdy as ours, would be about $400, and we’d still have to get rid of the table. Now our table has seen better days, but it’s still fully functional, so instead of throwing it away (or donating it, relax), and buying something new, we decided to save some money and make exactly what we wanted.
THE CONCEPT
What I really wanted was a rolling cart that was close to counter height so I could use it for extra counter space that would still be comfortable for chopping things (I’m 5’10+ so anything much lower is very hard on my back) and that could also store some of my larger small appliances like my KitchenAid stand mixer and food processor. The stand mixer is 18″ high, so the shelf needed to be low on the legs. This works out in terms of stability, also. After a couple of days of off and on discussion, we came up with the final design.
We’d have 1x3s attached to the front and back lengths of the table with the shelf (of yet unknown material) laying on top of the 1x3s and attached via corner braces. We’d leave the top of the table alone so we didn’t damage the mechanism that extends the table, but we’d use rubberized shelf liners and a piece of butcher block or a large cutting board as the top surface.
THE SUPPLIES
Our first stop was, of course, Ikea. We knew we wanted the top to be used as a work surface, and Ikea sells countertops. Plus we got the table itself at Ikea years ago (they still sell it btw). Okay, and, admittedly, we both wanted Swedish meatballs for lunch. Sue me. Anyway, after much perusing, we decided on two LÄMPLIG chopping boards.
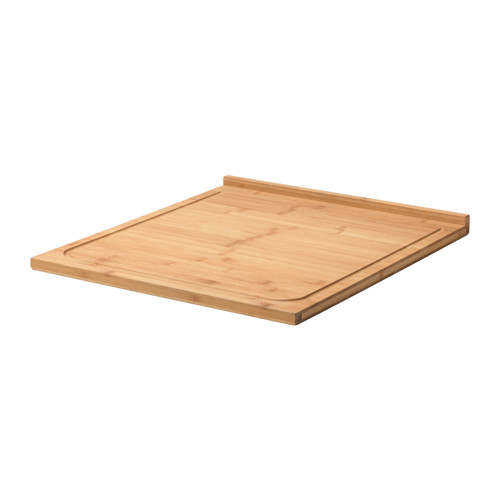 These chopping boards have a lip on one side so they hang over the edge of whatever you put them on. This works out great for our design because the lip will act as a front edge to the cart and make it look like it has a much thicker piece of wood on top. We had to get two to cover the top, but the two together fit the top with just the tiniest bit of overhang.
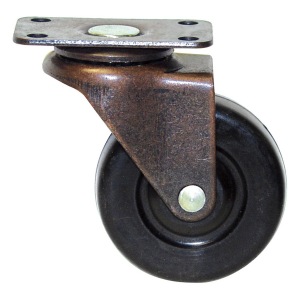
Next we went to Lowe’s to hunt for the rest of the supplies. We started with looking for casters, and I loved these bronze ones so much we spent a little extra on them.
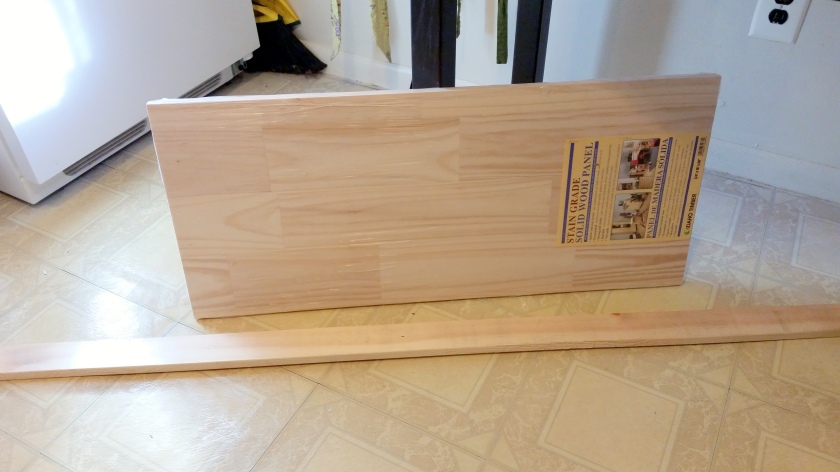
 Next we grabbed the 1×3 and a piece of stain-ready laminated pine that was so close to the right size we couldn’t help but grab it.
 We grabbed a hacksaw, since the cutting would be minimal, and then headed to the hardware section to find the corner braces and screws we needed. Here’s what we got:

- 8 corner braces (1″ x 1″ with 1 hole on each side)
- 1 pack of 1 1/2″ wood screws to attach the 1×3 to the legs
- Inexpensive hacksaw
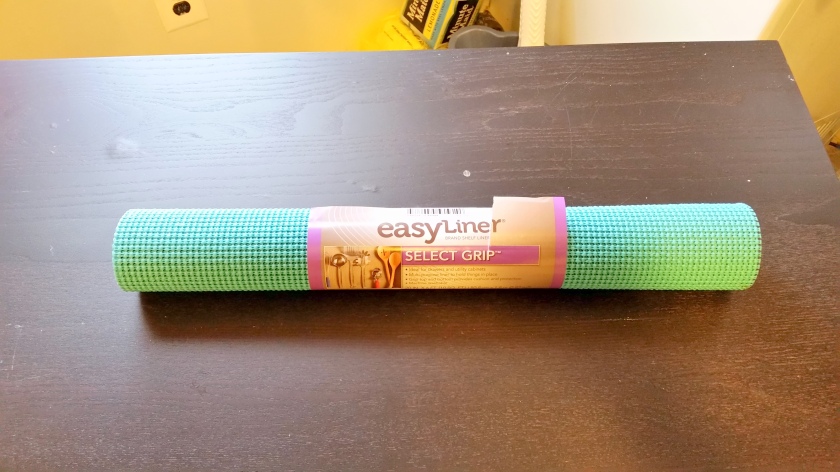
Lastly we grabbed a roll of the rubberized shelf liner at Walmart. It’s a really pretty blue, which is a shame because you can’t see it in the finished product.
We also used the following tools from our tool chest:
- A drill
- A 1/4″ drill bit
- A Phillips head screwdriver bit
- A measuring tape
- A pencil
That’s it!
THE ASSEMBLY
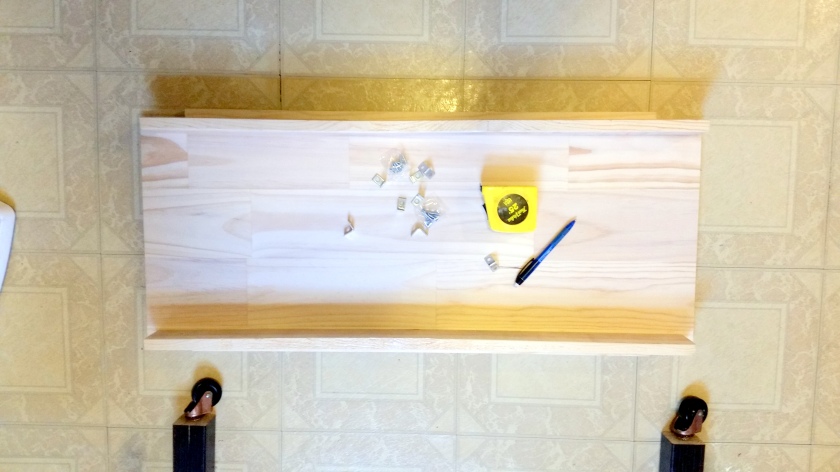
The very first step is MEASURING EVERYTHING PERFECTLY. I’m serious. You’ve heard the old adage “measure twice, cut once”? IT’S TRUE. DO IT. DOUBLE. CHECK. EVERYTHING. Or else you will end up sad. Friends don’t let friends be sad, mmmkay? I measured the table and, with a pencil, marked the lengths I’d need for the 1×3 and drew out the notches I’d need to cut in each corner of the laminated pine board.


Then I got cutting. I used what I had on hand as leverage for the boards: the table itself and my body weight! Cutting through the 1×3 was much easier than cutting through the laminate board, but it was still pretty easy across the board. If you were really worried about it you could sand the cuts but I wasn’t worried about it because they weren’t going to be visible. Then I dry-fitted the piece to see how I did on the cuts.
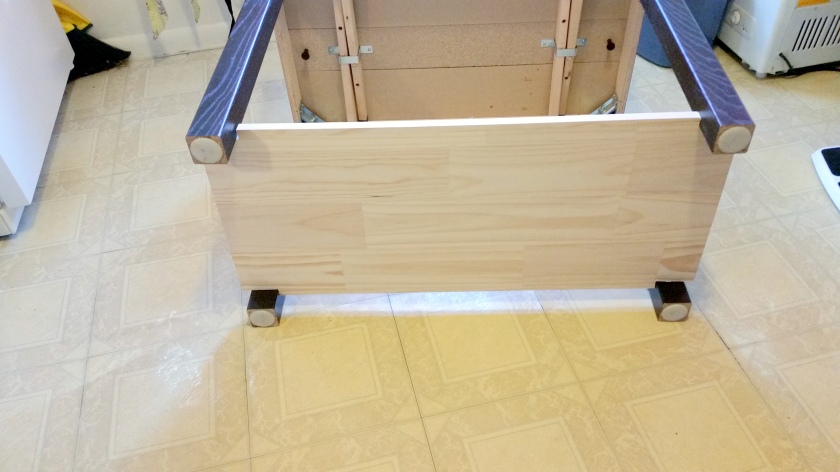
Next up was installing the casters. As you can see from the above photo, the table has little plastic feet. These pop out and reveal a hole drilled directly down the leg. This is PERFECT because it provides guidance for the hole you’ll need for the casters. The casters we got were longer than the pre-drilled holes, so we just had to drill down another inch or two to get it long enough. I had to wiggle the drill bit around a bit because the largest bit I had was 1/4″ and we probably needed a 5/8″ bit, but that’s okay. I forgot to get a picture of this, but it’s not a difficult concept.


We drilled the holes and then hammered in the casters, using a piece of wood I cut off the shelf as a pressure point. NOTE: It’s actually better to drill the holes a teensy bit too big than too small, because hammering the caster in will cause the leg to split a little if it’s too small. Being slightly too big will be okay because gravity will hold them into the holes.
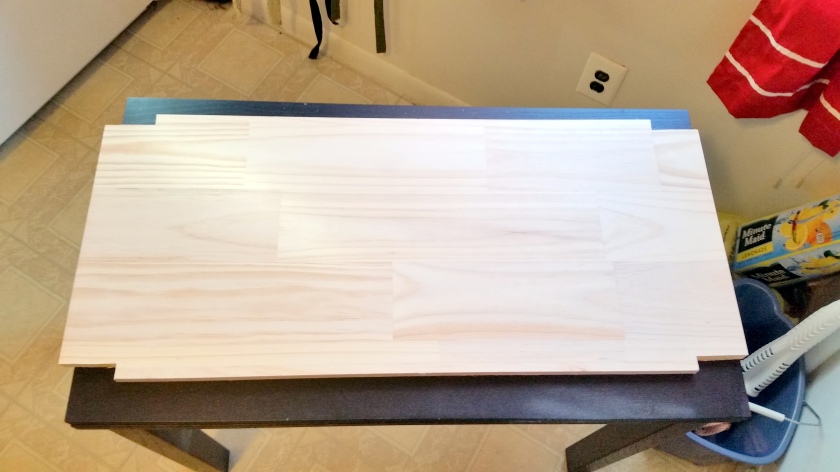
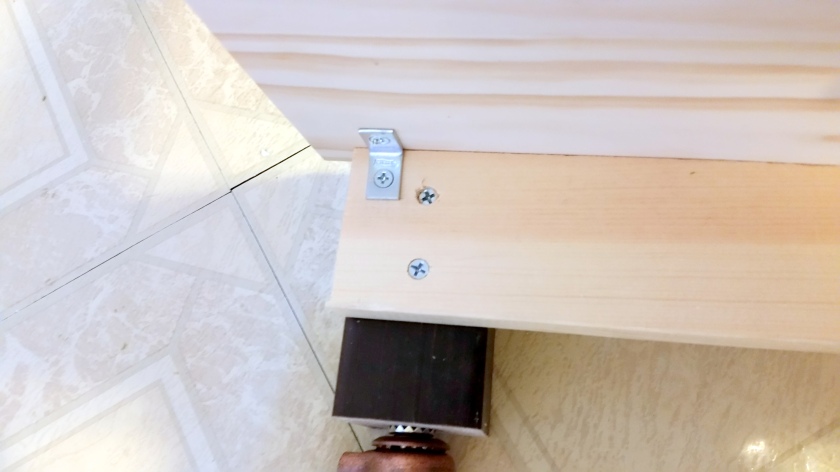
Next up was assembling the shelf. I recommend assembling the shelf and then attaching it to the legs, because you won’t have to worry as much about lining everything up. Using the corner braces, I attached the 1×3 to the bottom of the shelf, making sure it was centered. You don’t want to put a corner brace right where the leg will be, because you’ll need that space open to attach it to the leg itself.
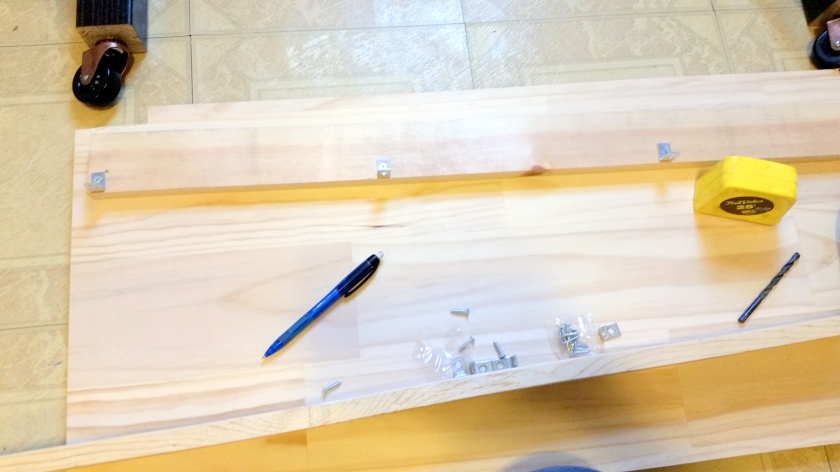
I repeated this on the other side and once again gave it a dry fit.
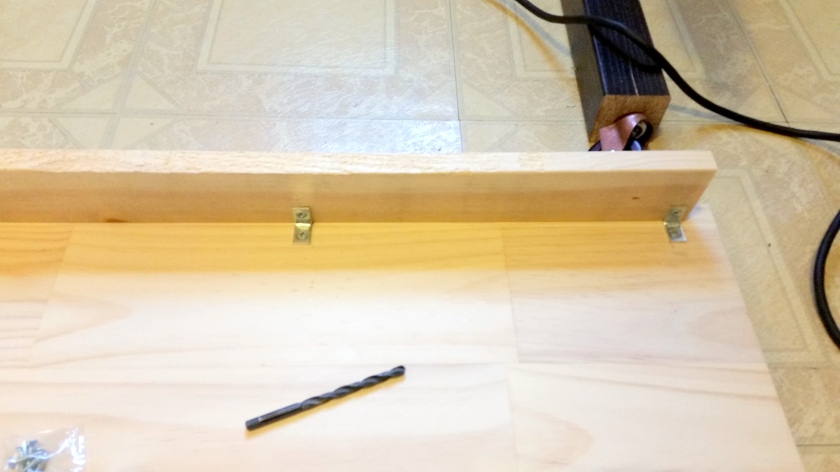
 The next step was to attach it to the legs. I used the 1 1/2″ screws to attach the 1x3s to the legs, making sure to measure how low I wanted the shelf to be. My KitchenAid stand mixer is 18″ tall, so I made sure the top of my shelf was a full 20″ from the bottom edge of the tabletop. I used two screws on each leg to make sure the shelf was secure.
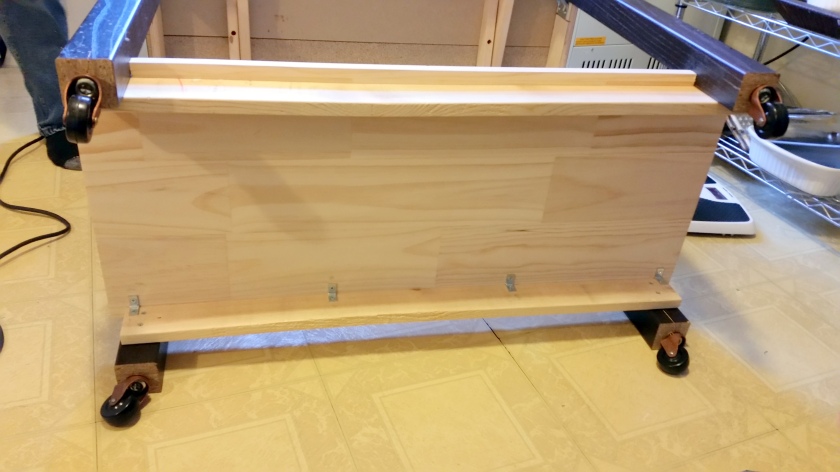
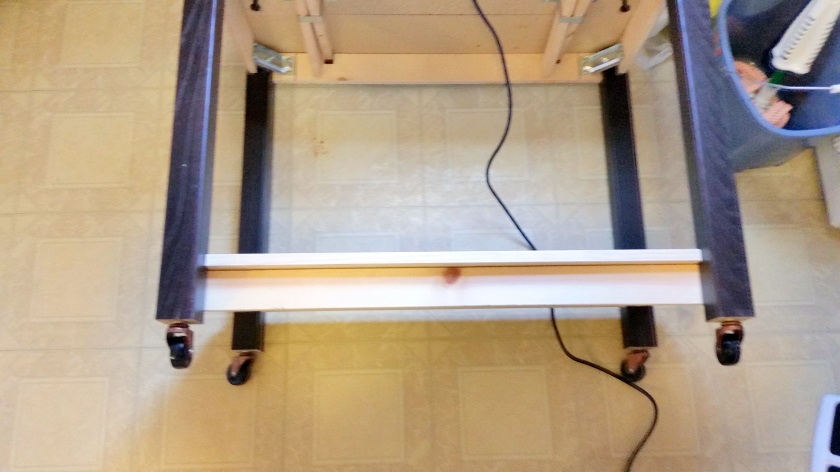
By then it was time to stand this baby up!
 At this point, technically the cart is done, but if you recall, I wanted to top it with a cutting surface, as the table’s actual surface is laminate and it bubbles when it gets wet, plus a little extra height helps for comfortable cutting. So I put a layer of shelf liner on top.
 Then I set the cutting boards on top of that, making sure the lips hang over on the same side.
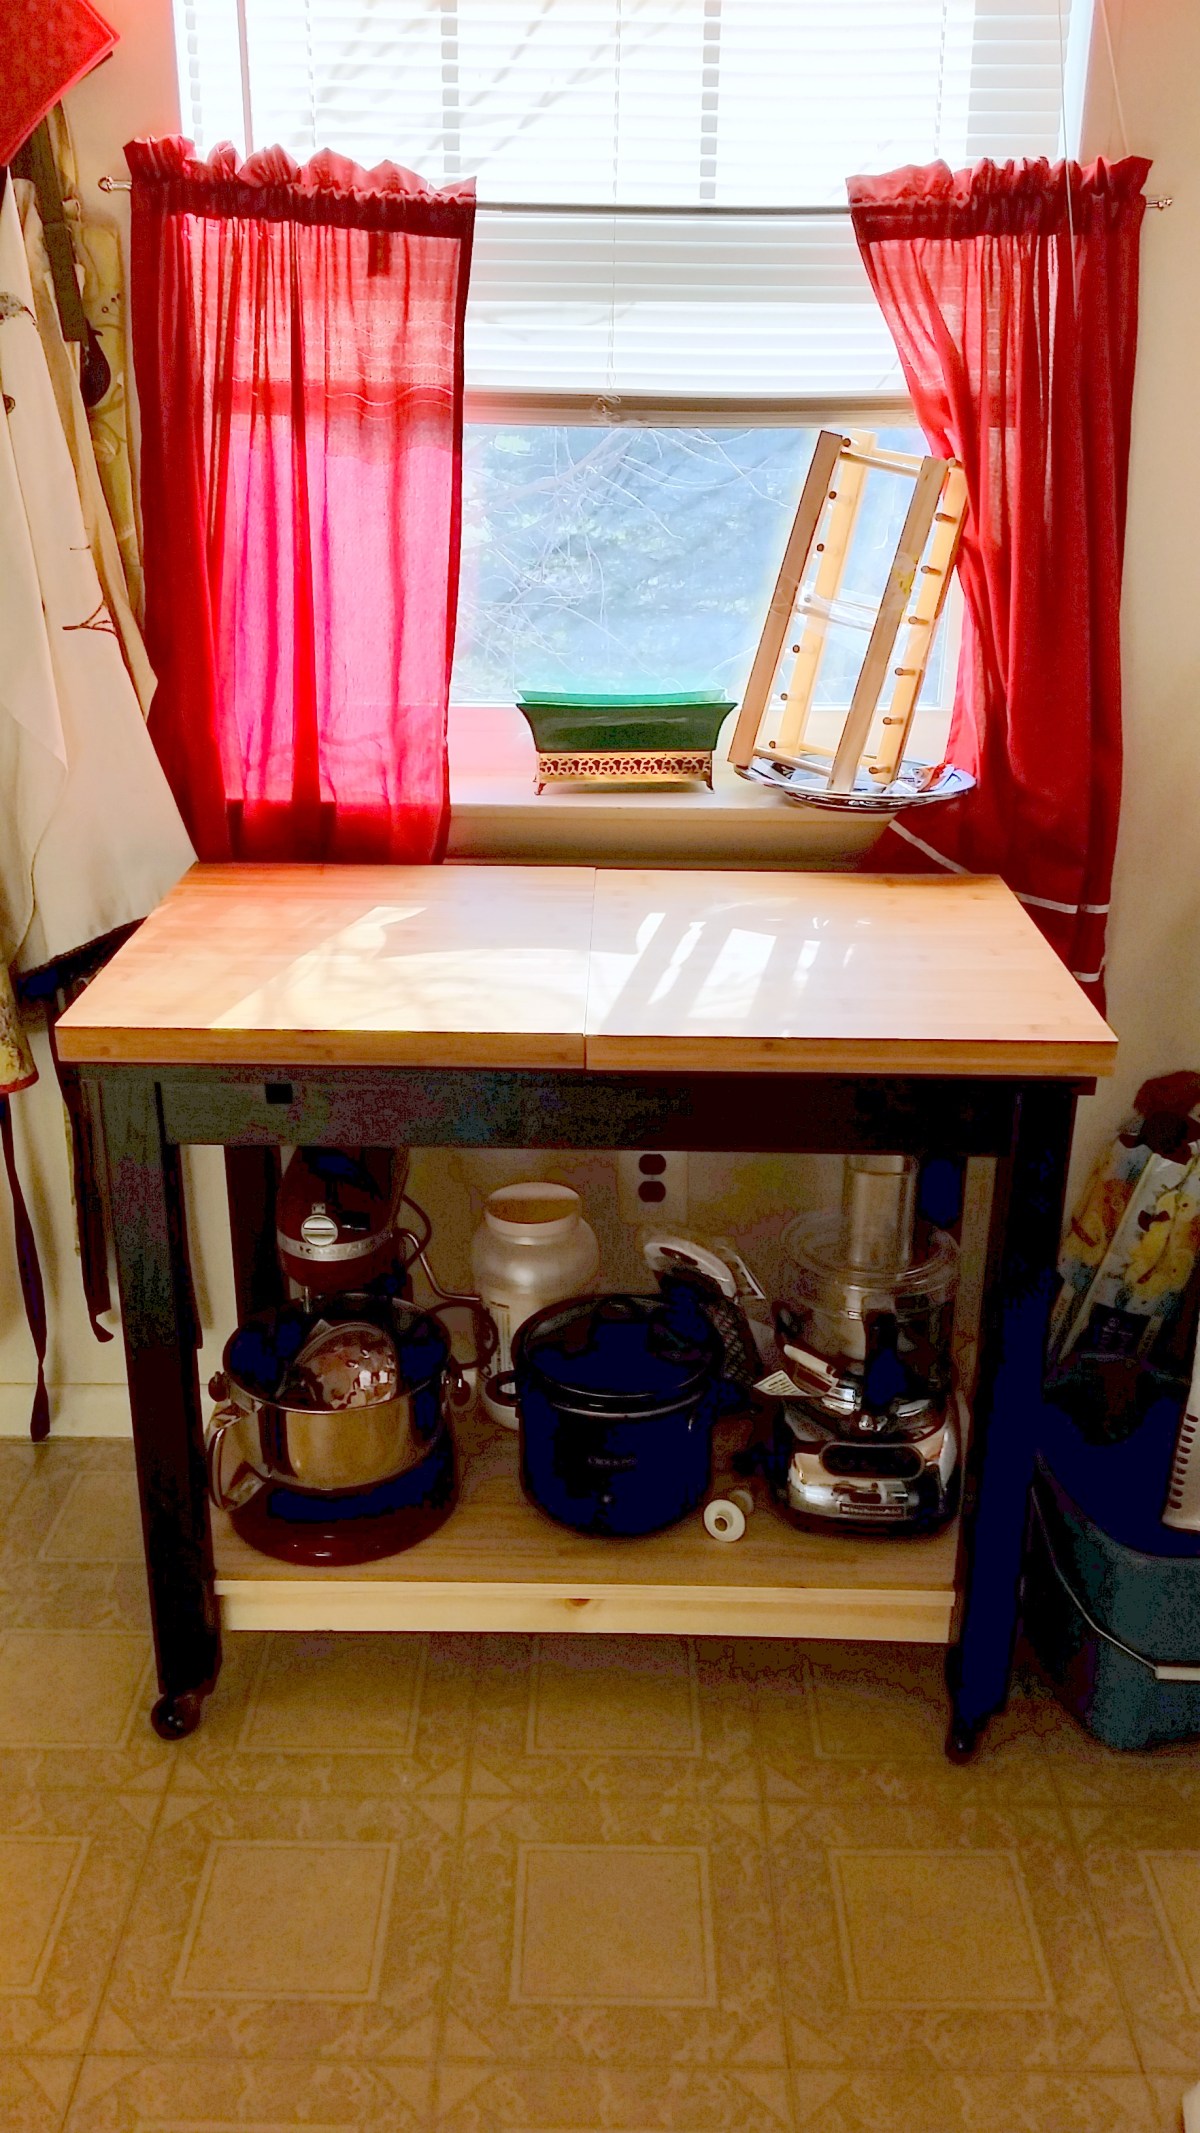
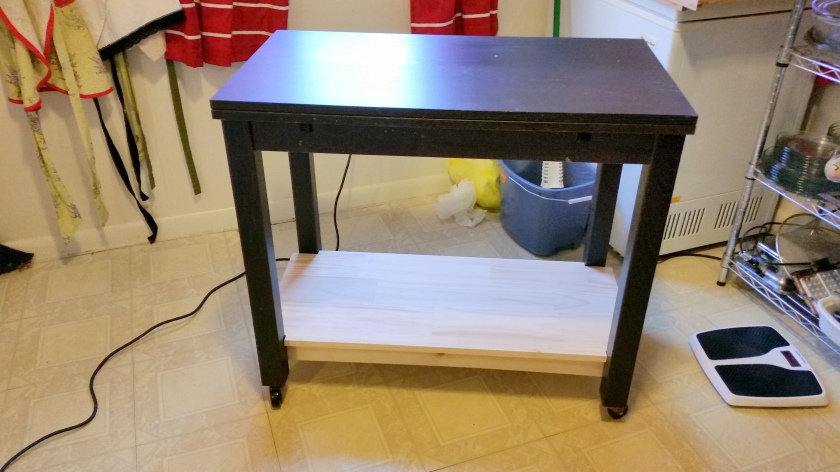
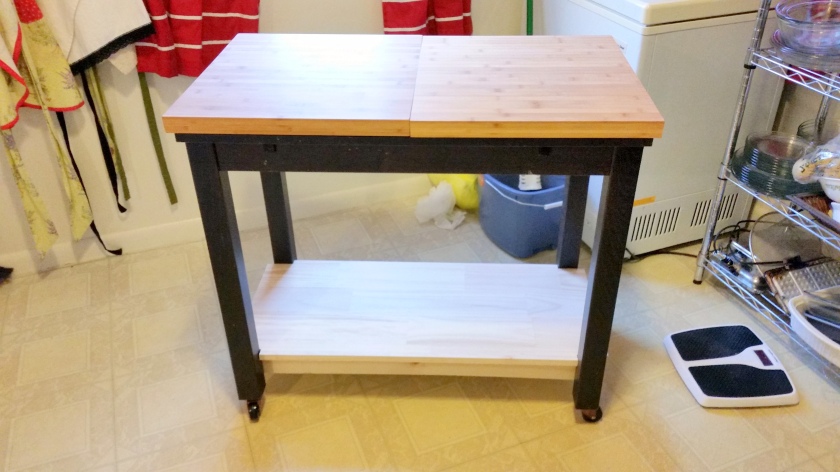 And it’s done! Nothing left to do now but to put my appliances on it and put it to work!
 I’m so excited about my new cart!
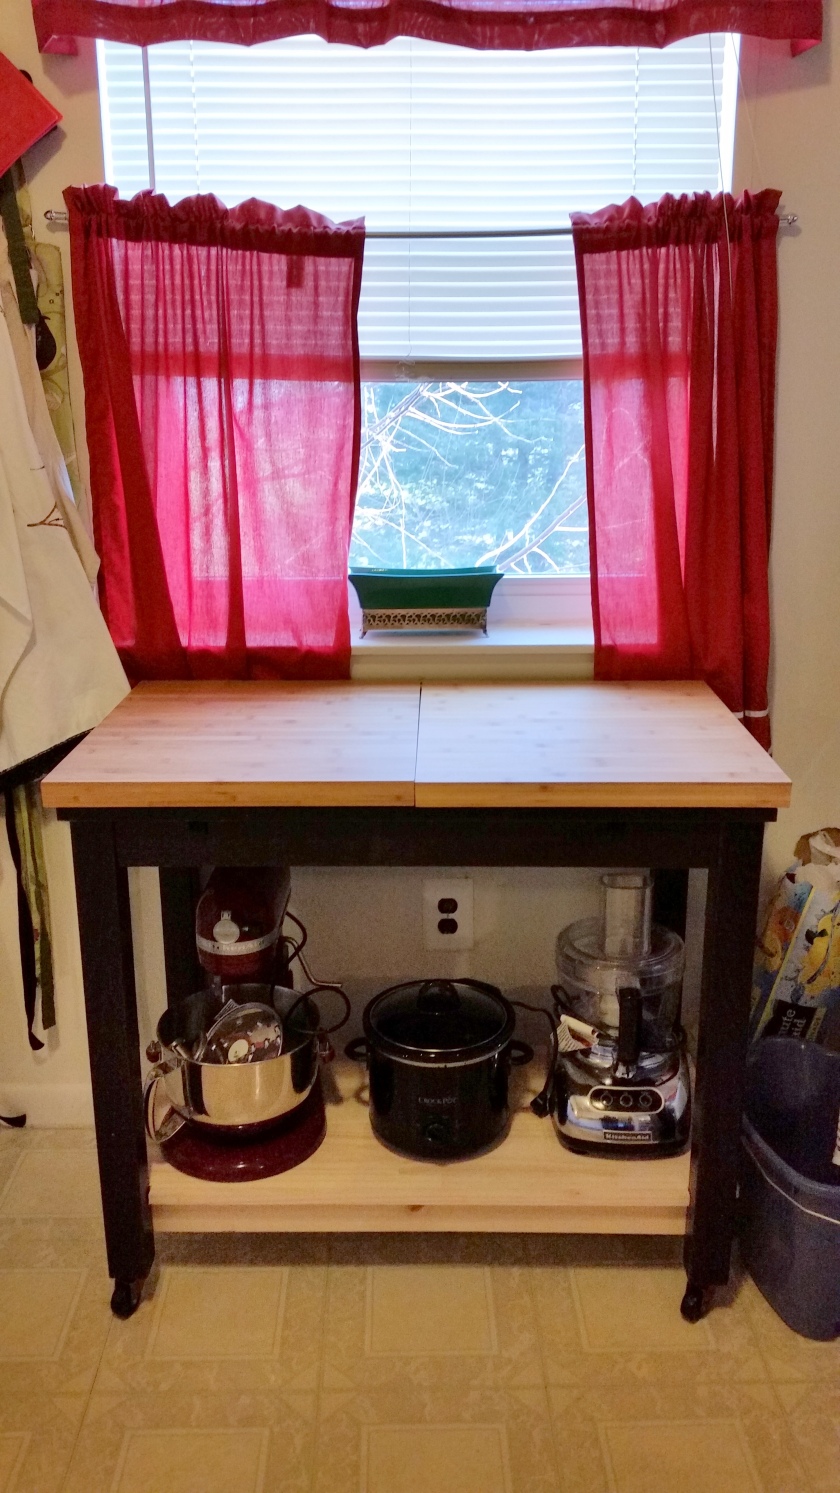
I can’t wait to try it out and show you. Maybe I’ll even do a VIDEO! *gasp*
We’ll see. 😉
Look at how much counter space I have now! (You can see what I had to work with. The space where the fruit bowl is was also holding a food processor AND the stand mixer. I cooked every meal in the tiny 30″ x 30″ space to the left of the stove.)
Have you made anything like this that you’re super proud of? Toot your own horn in the comments!


Yassss Queen! You guys are amazing! Love the final result! Smarties! IKEA meatballs, hehe, feel ya.
LikeLike
hey Ikea meatballs can fit into a reduced calorie diet! the full meal wa sless than 480 cals. 🙂 thanks, SparkMama!
LikeLike
Fantastic! Adding to your storage space and doubling your counter space is genius. Looks good to.
LikeLike
Thanks, Linda! The best part is that it’s exactly what we wanted.
LikeLike
Excellent!! Just brilliant!!
LikeLike
thank you, Karen!
LikeLike
Awesome job Andrea & Paulo !! love it !!
LikeLike
thanks, Laurie!
LikeLike
WOW…VERY impressive..I am telling you you are ready for your own tv show!!!
LikeLike
tell that to the people who make tv shows! 😉
LikeLike